

Setting up a jarrarium is different from setting up a regular aquarium, as you have more options when it comes to choosing the substrate.
This varies depending on the type of jarrarium you want to create and in today’s article we’ll cover them all.
I will get in depth on this below, but if you simply want to choose the easiest route (which is buying the substrate from a store), I recommend Fluval Stratum (affiliate link). Works great for jarrariums with just plants, as well as those with livestock/larger ones.
The type of substrate you choose will be greatly influenced by the type of jarrarium you want to create: a sealed or unsealed one, with or without livestock.
Generally, we could divide jarrariums into these subcategories:
- Natural ecosystems (usually sealed)
- Plants-only jarrariums (usually smaller)
- Mini-aquariums (larger, usually unsealed)
While you could definitely use the same substrate for any of these subcategories (or anything else you have in mind), it’s best to go with a different approach for each type.
Here are the types of substrate I use when setting up my jarrariums:
- natural substrate (taken directly from a pond, river, or the sea)
- store-brought substrate
- a mix of potting soil and store-brought pebbles
How to choose the best substrate for your jarrarium
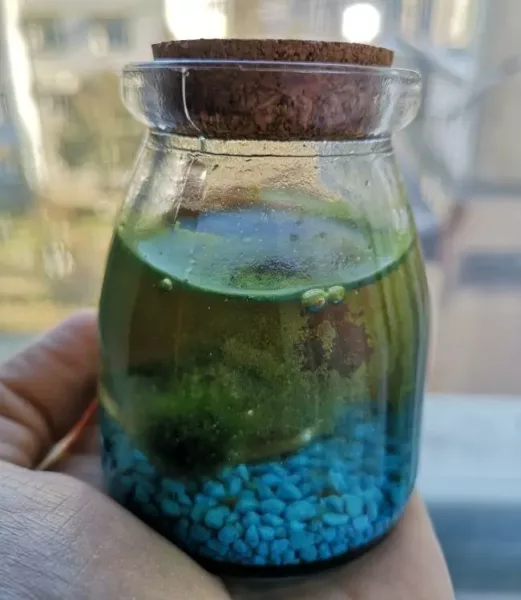
When I started out, I went the easy way and used regular aquarium pebbles bought from my nearby pet store as a substrate. While these are still holding, they’re not thriving.
Here’s my first jarrarium, built in 2016 and still surviving (although it’s nothing fancy):
Now I know that the type of soil you choose for your jar is extremely important and it varies depending on what you want to achieve.
Based on the categories listed above, but also on the type of substrates we can pick, we have a few options that work well for multiple categories of jars. Let’s check them out below!
1. Getting your substrate from a pond / creek

You will get both the water and the substrate from the same place – a creek, a pond, whatever source of water you have nearby.
This will be the most fun to watch, but also challenging. Lots of worms and living beings will appear in your jar if you follow this method.
As a result, this is the “most” natural way to do it.
Simply go to a natural source of water nearby and collect enough mud from the bottom (close to the shore) to fill the bottom of your jar at about 2 inches.
Grab at least a few cups of water from the same place and top it up with dechlorinated water at home. This way, your jarrarium will be basically cycled and life will appear ASAP.
IMPORTANT: Do water tests if you want to add your own livestock to this jar. It might have bacteria that could harm shrimp or fish, as well as snails that could gobble up some types of plants!
This type of substrate/approach is perfect for natural jarrariums and sealed ecosystems. Just grab the substrate and water then see what comes out of it. Ideally supplement with some plants as they won’t grow on their own.
You can also use this method for creating a larger jar, but be warned that there will usually be all sorts of worms and snails in the water – including potentially harmful bacteria, as stated above.
There’s nothing wrong about having worms and snails (and other living beings) in your jar – just make sure that you know about this beforehand.
In my case, I took water from various sources around my city and I never had to deal with disease-provoking bacteria, so my shrimp (and even fish) did very well in. But always do the tests!
I personally prefer this “natural” approach to all others because it’s extremely fascinating to watch the evolution of your jar.
This will also usually lead to some sort of over-population and mass extinction and there’s always the risk that it won’t be able to attain that perfect balance required for a long-lasting jarrarium… but it will be fun to watch, nevertheless.
2. Using store-brought substrate
This gives you more control over the livestock in your jar since it will be free of bacteria, and worms – and will be made specifically for aquarium use. So perfect for jars too!
In other words, if you want more control, follow this route. It’s not easier or more difficult – it’s just a bit different.
I usually recommend using two types of substrate here – but again, it depends on what your final goals are.
If you only want to create a small jarrarium with one-two plants and nothing else, than you can easily go for some regular gravel (this one is the best – affiliate link) and nothing else.
Make sure to only choose plants that are recommended for jarrariums: hardy plants that don’t need a lot of extras to do well).
If you want to build something a bit more complex – maybe larger, maybe with more plants (some of them more demanding too), but also at least some sort of livestock – at least snails or shrimp, I recommend mixing two types of substrate:
First, use something like the amazing Fluval Stratum (affiliate link), covered by regular gravel like the one recommended above.
This combination will offer your plants extra nutrients to start with, but also minerals required by your livestock to do well in the small ecosystem you are building. This way, you will basically get a mini-aquarium, but in a jar. And it can be completely sealed too!
You can read more about my recommended types of substrate for aquariums here. You can use them in a jarrarium also.
3. Using potting soil for your jarrarium
To be honest, I don’t see a big difference between the method recommended above and this one. It’s a lot more work too!
Yes, the dirt will make your jar look a bit more natural, but it will also result in cloudier water sometimes and might require extra cycling of the jar as the nitrate content can spike up easily.

Plus, you will have to top it off with something like the gravel recommended above – so your overall substrate will be thicker.
Basically, as the name suggests, you will use some good potting soil for your jar. You will have to choose something that’s 100% organic with no added fertilizer and safe for being underwater.
I personally use this one (affiliate link), but I really believe that any type of organic soil would work.
You will have to prepare the soil first and drench it in water. This can be done either in the jar itself or in a bucket.
Simply add as much soil as you need to get to around 1.5 – 2 inches thickness (I usually don’t go as thick with soil, since it is very rich in nutrients) and water it nicely.
Use a stick to mix it well and ideally let it soak in water for 1-2 hours. The water should be around 1 inch above the potting soil. Mix every now and then.
When the soil is completely damp, I personally cover it with toilet paper (without perfume or any other treatment). On top of that, I add the gravel recommended above.
This should also be pretty thick – 2 inches – in order to prevent the dirt from escaping (you add a layer of protection with the toilet paper).
When adding water, do it slowly in order to keep the mud down there. I usually punch a few holes in the bottom of a plastic bottle and pour the water on it.
Finally, you can add the plants you want and let the water cycle. You will need to give it 2-4 weeks before adding livestock (although you can usually add snails sooner) and do at least a few partial water changes during this time.
You might have problems with algae bloom or similar problems, but your aquarium will look like a natural one – without the risk of getting all the unwanted hitchhikers that method would automatically include.
Conclusion
You can use any type of substrate when creating your jarrarium. The main difference, on the long term, is how it will look and what kind of nutrients will it offer to your plants.
Remember that any livestock you add will create waste, which will become nutrients for your plants, so even if you don’t add potting soil or mud from a stream of water, you can still have enough nutrients for your plants.
I also created a test jarrarium with demineralized water, store-brought gravel and a small Anbuias and it did well.
But when setting up a jarrarium, you do want it to look perfect and the substrate will contribute to that. Now you know the differences between the options you have and you can get to work.
If you still haven’t picked your jar yet, make sure to check out my article about the best jars for jarrariums here.